
How to print custom sized photo in Picasa 3 is actually pretty straightforward—no extra software or complex setups required. Here’s a quick guide for Google’s Featured Snippet:
I’m Brett Henrichsen, founder of Posterprintshop and expert in custom photo printing; I’ve spent decades helping businesses master image sizing and print quality, including how to print custom sized photo in Picasa 3. Let me walk you through the details of the process to make your prints perfect every time.
Key terms for how to print custom sized photo in picasa 3:
– custom movie posters
– how to print custom size photos
Before we jump straight into the step-by-step guide on how to print custom sized photo in Picasa 3, let’s quickly cover a crucial topic: aspect ratios. I promise it’s easier than it sounds!
An aspect ratio is simply the relationship between the width and height of your image. Think of it as the shape or “frame” your photo fits into. Common aspect ratios that you’re probably familiar with are 3:2 (the classic DSLR camera shape), 4:3 (typical of older digital and point-and-shoot cameras), and the square 1:1 ratio used widely on Instagram.
Why does this matter when printing custom sizes? Glad you asked!
When you print a photo, your image needs to match the aspect ratio of the final print size. If it doesn’t, your beautiful family portrait may suddenly have Grandpa missing half of his face or your lovingly prepared landscape photo might look oddly squished. Nobody wants that (especially Grandpa).
Picasa 3 doesn’t shout about it loudly, but it has powerful cropping tools perfect for custom printing. As one user shared, “Did you know you can crop your photos in Picasa to any size you want—not just a standard square?” It’s a hidden gem once you know where to click!
Here’s why it’s so important to pay attention to aspect ratios in printing:
Print Accuracy: The right aspect ratio means what you see on your screen is exactly what you’ll get in your print. No surprises or awkwardly cropped images.
Quality Preservation: Using the correct aspect ratio helps prevent distortion, so your subjects don’t end up looking oddly thin, wide, or stretched.
Framing Compatibility: Printing custom aspect ratios ensures your photo will fit perfectly into special frames with unique sizes. Want to hang your masterpiece in that funky square frame your kid painted last summer? Easy.
For instance, imagine you have a square frame (that’s our friendly 1:1 ratio), but the image you’re working with is a 3:2 ratio. With Picasa 3, it’s easy to crop your photo neatly into the square shape before printing—no hassle at all.
Let’s check out how these aspect ratio options look in Picasa 3:
Now that you’ve got the basics of aspect ratios down, you’re ready to master cropping and custom sizing in Picasa 3. Trust me, your prints (and Grandpa’s face!) will thank you.
In the next section, we’ll walk step-by-step through how you can easily set and save your custom cropping ratios in Picasa 3—making printing custom sizes a breeze.
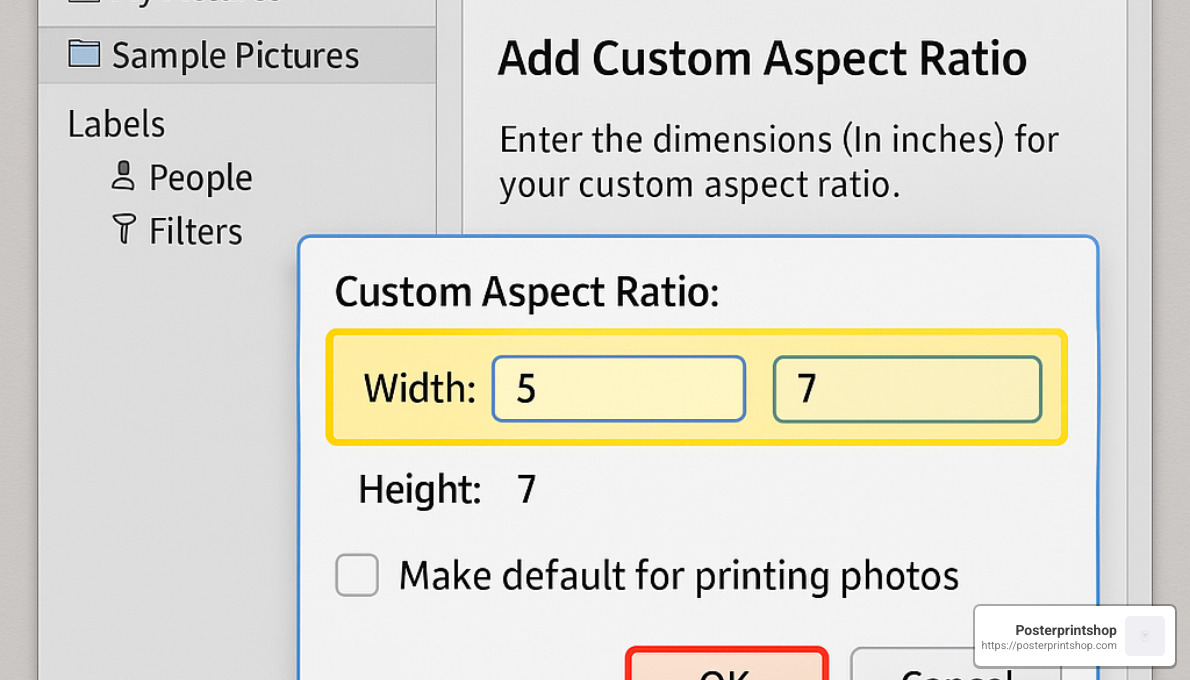
One of the best-kept secrets in Picasa 3 is its ability to create and save custom aspect ratios for cropping your photos. If you’re looking to print your photos at special dimensions—whether it’s a unique square, a long panoramic view, or just something a little different—this feature will be your new best friend.
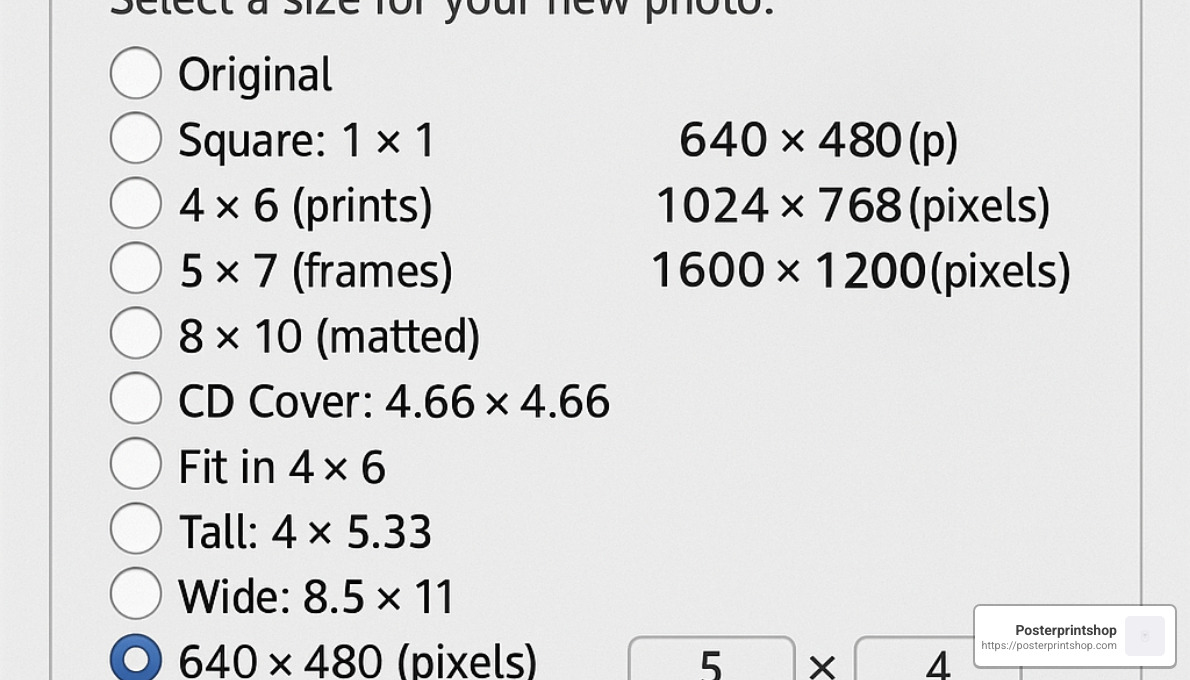
Here’s how it works: first, open the photo you’d like to print at a custom size in Picasa 3. Next, click the Crop button under the Basic Fixes tab (or hit Ctrl+Shift+C to speed things up). A dropdown menu of aspect ratios will appear—scroll down to the very bottom and select “Add Custom Aspect Ratio.”
In the window that pops up, simply type in the dimensions you want. For example, enter 8×8 for square prints, 960×250 for blog headers, or even 9.5×14.5 for a uniquely sized custom frame. It’s a good idea to give your new aspect ratio an intuitive name, something that’ll jog your memory next time. A descriptive name like “Square 8×8” or “Blog Header 960×250” will help you quickly find and reuse it.
Once you’ve saved the custom ratio, Picasa 3 will immediately show a crop box on your image. You can drag this box around and resize it freely, allowing you to carefully frame your photo exactly as you envision for printing. When you’re satisfied, click “Apply” and your photo will instantly crop to these precise proportions.
As dpollitt, one helpful user, puts it:
“Simply select the Crop option, then ‘Add Custom Aspect Ratio’ at the bottom of the crop options. This will allow you to select a custom size such as 8×8, then export it as such.”
It’s as easy as that! No complicated software or confusing menus—just a straightforward method that ensures your printed photo matches exactly what’s on your screen.
The real beauty of this feature isn’t just cropping your photo exactly once; it’s that Picasa saves these custom settings for future use. If you’re frequently printing or sharing photos at special sizes, this built-in feature can be a massive time-saver.
For instance, let’s say you regularly print square photos for Instagram-style prints, panoramic shots for wall displays, or banners for your blog or Facebook page. You can sit down for a few minutes and create a handy library of your most-used aspect ratios. Popular custom sizes you might add could include 850×315 for Facebook covers, 960×250 for blog headers, or 8×8 inches for square prints.
Having these aspect ratios saved and ready to use makes cropping entire batches of photos a breeze. Plus, you won’t have to remember the dimensions each time—simply select your pre-saved custom ratio and Picasa 3 takes care of the rest.
One savvy user we came across said, “I’ve created custom sizes for Facebook Timeline Covers (850 x 315), WordPress Blog Headers (960 x 240), and even Store Headers (950 x 200). Having these saved in Picasa makes it super easy to prepare images for different uses.”
So next time you’re prepping your photos for printing with Posterprintshop—or getting your images ready for social media, custom frames, or unique displays—remember this handy trick. In a matter of seconds, you’ll have your photos cropped and ready to print at exactly the right size, ensuring your finished product looks beautiful every single time.
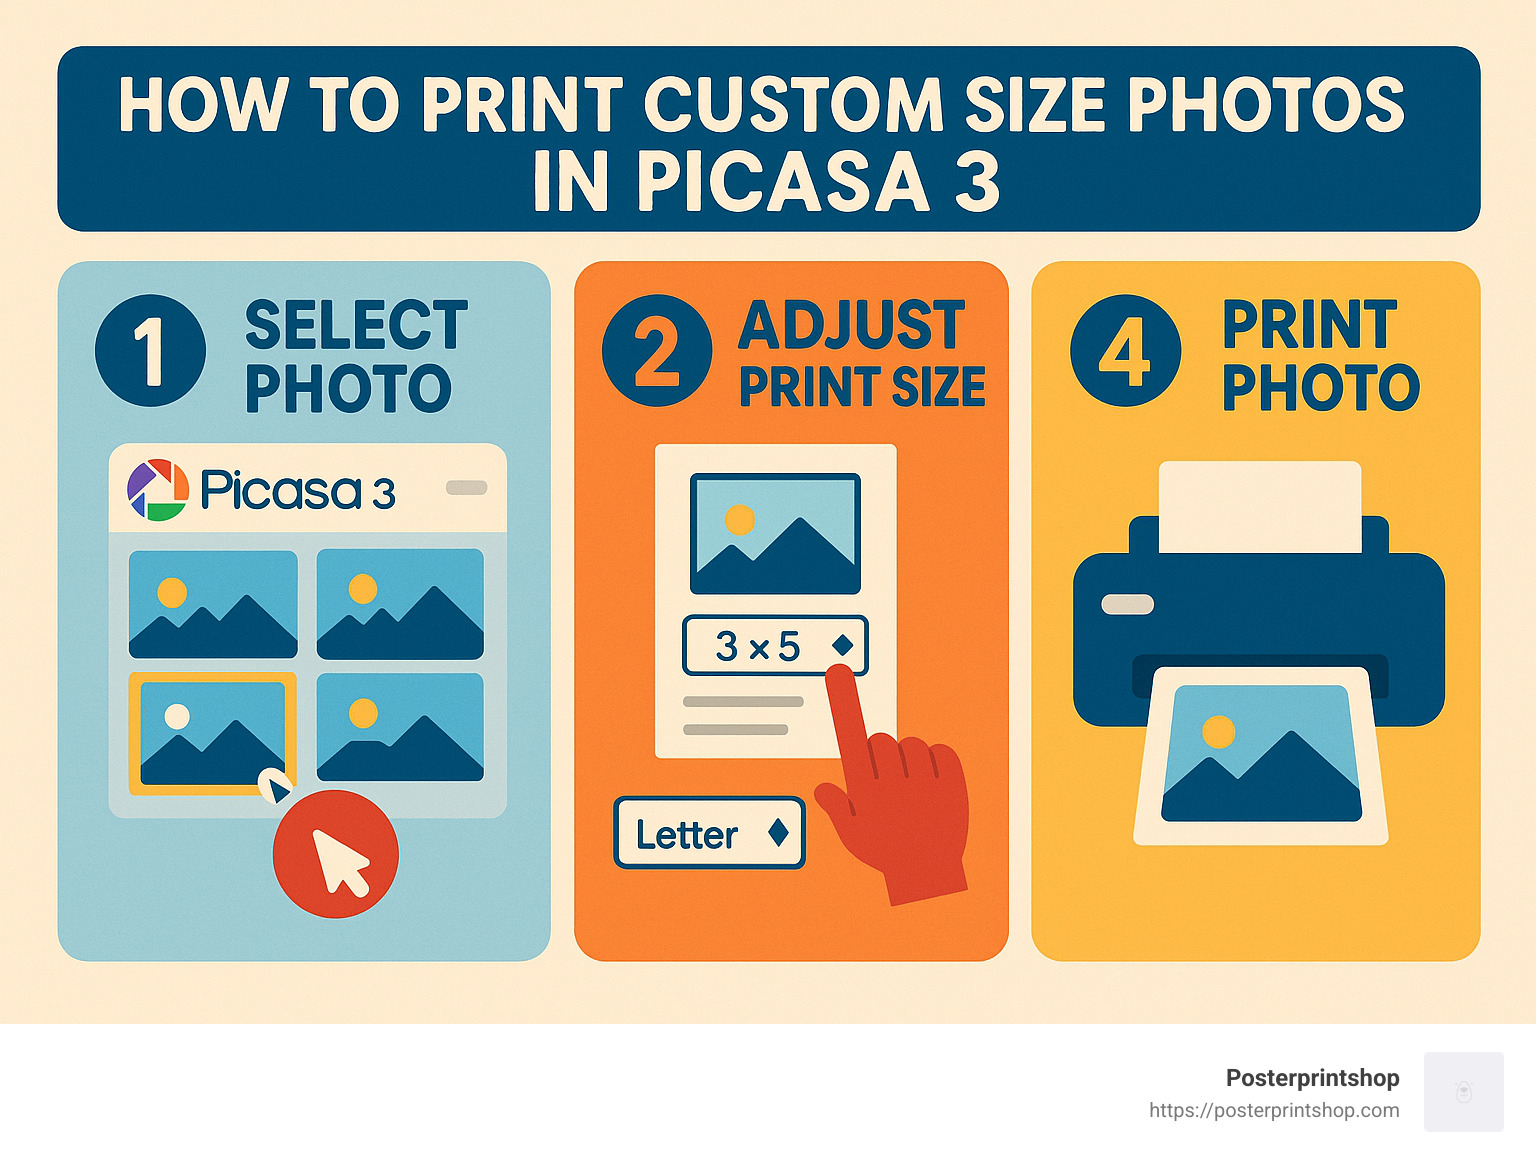
Let’s get down to the nitty-gritty of what you’re here for – how to print custom sized photo in Picasa 3. I know it can be frustrating when you’ve got the perfect shot but can’t seem to print it at exactly the size you want. The good news? It’s totally doable with Picasa 3, even though it’s not immediately obvious how to do it.
Picasa 3 doesn’t have a big shiny “print custom size” button (wouldn’t that be nice?), but with a few simple steps, you can get those perfect prints every time. Think of it as a little secret between us photo enthusiasts!
The basic workflow looks like this: crop to the right aspect ratio, adjust the canvas size, export at the right dimensions, and then print. Let’s break this down into something you can actually use.
Have you ever printed a photo only to find it’s not quite the size you expected? That’s where canvas size adjustment comes in. While Picasa 3 doesn’t call it “canvas size” specifically, you can achieve the same effect through the export process.
Here’s my tried-and-true method for how to print custom sized photo in Picasa 3:
For example, if you want a perfect 8×8 inch square print at 300 DPI (which gives you professional print quality), you’d enter 2400×2400 pixels. Why? Because 8 inches × 300 pixels per inch = 2400 pixels. Simple math, big difference in results!
I love what one of our customers said about this: “It’s amazing that the default Windows print option doesn’t have a print actual size functionality. By adjusting the canvas size in pixels before printing, you can ensure your photo prints at exactly the dimensions you want.”
A quick note about DPI (dots per inch) since it matters for print quality:
– 300 DPI is the gold standard for professional prints (what we use at Posterprintshop)
– 200-240 DPI works fine for most home printing jobs
– Below 150 DPI and you might start seeing those pesky pixels, especially in larger prints
The “Export Picture to Folder” feature is truly your best friend when it comes to how to print custom sized photo in Picasa 3. I use this all the time with my own photos, and it gives you amazing control over your final image.
Here’s how to make the most of this feature:
First, select the photo (or photos – yes, you can batch process!) that you want to print at a custom size. Then hit “File” → “Export Picture to Folder” (or press Ctrl+Shift+E if you’re a keyboard shortcut fan like me).
In the export dialog box, you’ll want to:
– Pick where to save your resized photos
– Choose JPEG format (best for printing in most cases)
– Check that “Resize to” box and enter your dimensions
– Move the quality slider toward the right for better print quality (especially important for larger prints)
The really cool thing about Picasa’s export feature is that it automatically preserves your aspect ratio when resizing. This means your family members won’t end up looking squished or stretched in your prints – always a plus!
Let’s say you’ve cropped a beautiful family portrait to an 8×10 aspect ratio. If you want to print it at that exact size with 300 DPI, you’d enter 2400×3000 pixels (8×300 for width, 10×300 for height).
If you’re interested in more details about resizing in Picasa 3, check out How to Reduce a Photo’s Size in Picasa 3.
Exporting doesn’t actually print your photo – it just prepares it perfectly for printing. Once you’ve exported your image, you can either print it on your home printer or upload it to us at Posterprintshop for professional-quality prints.
I’ve helped hundreds of customers with this exact process, and the results speak for themselves – perfectly sized prints with no unexpected cropping or distortion. That’s the magic of knowing how to print custom sized photo in Picasa 3 the right way!
You’ve done it! You’ve expertly cropped your image in Picasa 3, set your desired aspect ratio, and prepared it at the perfect dimensions. Now comes the exciting part—actually exporting and printing your photo so you can proudly display it. Here’s exactly what you need to do to make sure your printed photo looks as amazing as it does on your screen.
First, let’s make sure your image is ready for printing. Go back to the “Export Picture to Folder” option in Picasa 3 (remember, press Ctrl+Shift+E or choose it from the File menu). When exporting, double-check you’ve entered the exact pixel dimensions required for your chosen print size. For example, if your custom size is 8×10 inches at a high-quality 300 DPI, your exported image should be exactly 2400×3000 pixels. Choose maximum image quality to ensure a crisp, professional-looking print, and save the file somewhere easy for you to find.
Next, decide how you’ll print your masterpiece. You have several options depending on your convenience, budget, and desired quality:
Home Printing: If you’re printing at home, open your exported photo in the image viewer you normally use. Load your printer with the appropriate paper (like photo paper or standard printer paper, depending on your needs). When you open the print dialog, this step is crucial: always select the “Actual Size” or “100% scaling” option. Avoid selecting “Fit to Page” or any similar setting, as this can alter the dimensions of your carefully prepared image. (You’ve worked too hard for that!)
One common scenario you may run into is printing a custom-sized photo on standard-sized paper. Let’s say you’ve cropped your image to a square 8×8 inches, but your home printer only handles 8.5×11 inch paper. Don’t worry—this is perfectly normal. Simply print at actual size, then carefully trim away the excess paper with scissors or a paper cutter. Voilà, a perfectly sized photo, ready to frame!
Professional Printing through Posterprintshop: If you want guaranteed professional results without the hassle of trimming paper yourself, using Posterprintshop is a fantastic option. Just head over to our website, choose the custom size printing option, upload your exported image, and specify your desired print dimensions. You can even choose from various paper types, finishes, and materials to really make your image pop.
An added bonus of using a professional printer like Posterprintshop is that we match your custom dimensions exactly. No trimming necessary! All you have to do is open your shipment, slip your beautiful print into its frame, and admire it. Easy as pie, isn’t it?
As one Picasa user humorously pointed out, “I have a picture frame that’s square but had no idea how to print a cropped (square) photo onto regular A4 paper. I’d end up awkwardly trimming paper edges until the picture looked like my dog chewed it!” Fortunately, with the careful preparation you’ve done, you now know exactly how to print custom sized photos without looking like the family pet helped.
To recap, your quick checklist for exporting and printing custom-sized photos:
With these tips, you’ll be confidently printing custom sizes from Picasa 3 in no time. Whether you’re printing adorable family snapshots or stunning custom movie posters, Posterprintshop has you covered with high-quality, affordable prints delivered right to your door.
Even if you’re careful when preparing your photos, sometimes things don’t go exactly as planned. Don’t worry—it’s not you, it’s just the nature of getting custom-sized prints exactly right. Here are some common problems you might run into when learning how to print custom sized photo in Picasa 3, along with friendly advice to fix them quickly.
Does your printed photo look different from what you carefully cropped in Picasa? As photographer Noel Chenier once humorously lamented:
“Ever take a photograph to get printed at the photo lab, and it comes back squished or cropped completely different from how you cropped it?”
This usually means the aspect ratio of your cropped photo doesn’t match your desired print size. To avoid this, make sure you crop your photo in Picasa 3 to the exact aspect ratio needed for printing. For example, if you’re printing an 8×10 photo, crop your image beforehand using the 4:5 aspect ratio option (since 8:10 simplifies to 4:5).
If your printed image looks like it’s spent too long in funhouse mirrors, that’s probably because the printing software is fitting your photo to a different aspect ratio than intended. To fix this, double-check your print settings. Choose the option labeled “Actual Size” or “Scale: 100%”, and make sure “Fit to Page” is unchecked. If you’re using a professional printing service like Posterprintshop, just confirm your exact dimensions when uploading—easy peasy!
Pixelation happens when your photo doesn’t have enough resolution or detail for the print size you chose. To maintain crisp, professional quality, aim for a resolution around 300 DPI (dots per inch). For example, an 8×10 print at 300 DPI would require your image to be about 2400 pixels wide by 3000 pixels tall. If your original image is too small, try printing at a smaller size or check out Posterprintshop’s custom enlargement options—they use smart technology to help your images stay sharp, even at larger sizes.
Wondering why your beautiful sunset just doesn’t look the same printed as it does on your screen? Monitors display colors using RGB (red-green-blue), while printers use CMYK (cyan-magenta-yellow-black), so some differences are natural. To minimize surprises, try calibrating your monitor or printer if you’re printing at home. If color accuracy is super important, consider professional printing through Posterprintshop, where expert color management makes sure your prints come out true to what you see on screen.
Unexpected white borders can happen when your image dimensions don’t fully match your print size, causing the printer to add blank space around the edges. To solve this, make sure you export your photo with pixel dimensions exactly matching the print size you want—no more or less. For borderless prints, it’s standard practice to add an extra 0.125 inches (about 38 pixels at 300 DPI) of “bleed” around each side to ensure full coverage.
Feeling frustrated because Picasa 3 doesn’t seem to offer the exact custom size you need? You’re not alone. Thankfully, there’s a simple workaround. As we’ve detailed in previous sections, instead of printing directly from Picasa, first export your image using the “Export Picture to Folder” feature. Set the exact dimensions in pixels, then print the exported image from your preferred photo viewer or printing software. You can also upload your exported images directly to Posterprintshop for professional, hassle-free custom-size prints.
The key to mastering how to print custom sized photo in Picasa 3 is understanding your aspect ratio and resolution before you print. Follow these solutions to common issues, and you’ll easily get beautiful, accurate prints every single time.
Resizing your photos for custom printing can be a bit tricky—if not done right, your beautiful images might end up looking pixelated or blurry. But don’t worry! With a few simple techniques, you’ll master how to print custom sized photo in Picasa 3 without sacrificing quality.
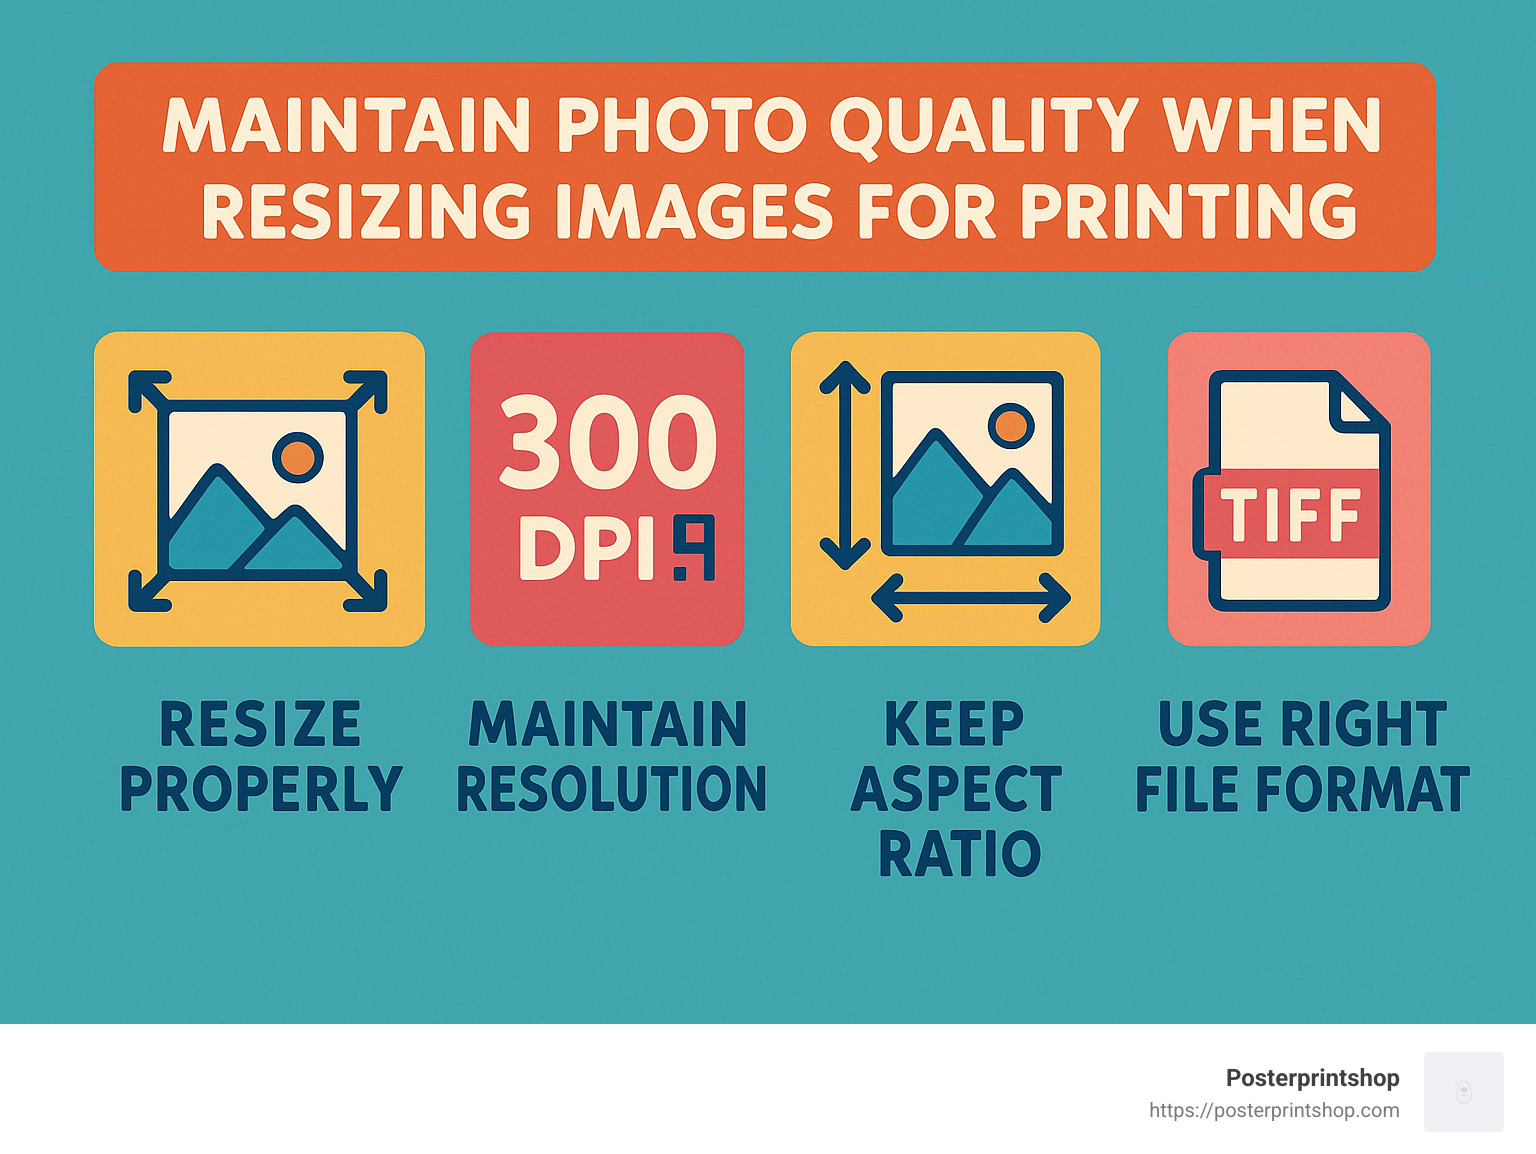
First, always start with the highest quality original image you have. Think of your original photo as the ingredients in a recipe: the better the ingredients, the tastier the dish! High-resolution JPEG files or RAW images from your camera provide the best foundation. Avoid using photos that have already been compressed or resized for web use, as these won’t hold up as well when you enlarge them for printing.
Next, it’s important to understand the relationship between pixels and print sizes. Your photo’s quality depends heavily on resolution, measured in DPI (dots per inch). For professional-quality prints, aim for around 300 DPI. Prints at about 240 DPI still look very good, and even going as low as 200 DPI is usually acceptable depending on viewing distance. Avoid printing below 150 DPI or you’ll start to notice those pesky pixels popping up!
Let’s say you want to print an 8×10 inch photo at 300 DPI. You’d multiply your dimensions by your DPI to find the ideal pixel size: 8 inches × 300 DPI = 2400 pixels wide, and 10 inches × 300 DPI = 3000 pixels tall. Easy, right?
Another important tip is to avoid multiple resizing operations. Each time you resize your photo, you’re losing a little bit of quality. It’s like photocopying a photocopy—the more you do it, the fuzzier it gets. Plan ahead and resize your photo just once, directly from the original down to your final desired dimensions. Your image—and your sanity—will thank you.
When exporting your image from Picasa 3, always use the highest quality settings. Select JPEG for photos (use PNG if you have graphics with fonts or sharp lines). Then set your exact pixel dimensions that you calculated earlier. Don’t guess or approximate here—precision ensures your printed image matches exactly what you intended.
Now, a common mistake many people make is trying to enlarge their photos too dramatically. A good rule of thumb: try not to increase your photo’s size by more than about 200%. Beyond this, your image might look grainy or blurry. But don’t be discouraged—if you need a large print from a smaller digital photo, services like Posterprintshop’s professional enlargement use advanced software to keep your images looking their best.
After resizing, you might notice your photos looking a little soft or less crisp. That’s normal. Thankfully, Picasa 3 offers a quick fix: the “Sharpen” tool under the Basic Fixes tab. Apply a gentle touch of sharpening—just enough to improve details but not so much that edges look unnatural.
It’s always wise to double-check your exported photo at 100% zoom before printing. This step helps catch any unexpected issues like pixelation, blurriness, or compression artifacts. Better to spot them now than after you’ve printed!
Finally, consider the viewing distance of your print. Larger prints—such as posters or banners—are usually viewed from a greater distance. Because of this, you can get away with slightly lower DPI (around 150-200 DPI) without noticeable quality loss. A billboard looks sharp from the highway, but up close it’s actually quite pixelated. Same principle.
By following these simple guidelines, you’ll master how to print custom sized photo in Picasa 3 while ensuring your images always look sharp, vibrant, and stunningly professional.
For high-quality custom prints every time, Posterprintshop is your friendly expert—offering brilliant, accurate, and affordable prints for every occasion. Check out our Custom Size Poster Printing page to see what we can do for you!
Let’s tackle some of the most common questions I hear from people trying to print custom-sized photos in Picasa 3. I’ve helped hundreds of customers through these exact issues, so you’re in good hands!
Good news! Picasa 3 is actually quite smart about this. When you use the “Export Picture to Folder” feature with the “Resize to” option checked, the program automatically maintains your original aspect ratio. You only need to enter either the width or height you want, and Picasa calculates the other dimension to keep everything in proportion.
Here’s where people often get confused though—if you need a specific aspect ratio that’s different from your original photo, you must first crop the image to that ratio using the Crop tool before exporting. I learned this the hard way when preparing family photos for my grandmother’s custom frame sizes!
The beauty of Picasa’s export feature is that it’s specifically designed to preserve these ratios, preventing that awkward stretched or squished look nobody wants in their printed photos.
This happens more often than you’d think, and it can be incredibly frustrating! When your printed photo doesn’t match what you see on screen, check these four common culprits:
First, double-check for an aspect ratio mismatch. Make sure you’ve cropped your photo to match the exact aspect ratio of your intended print size before exporting.
Second, review your printer settings. Make sure you’re printing at “Actual Size” or “100%” and not “Fit to Page” or another scaling option that might distort your image.
Third, if you’re using a print service, verify their print specifications. Confirm they’re printing at exactly the dimensions you specified without any automatic cropping or scaling.
Finally, remember paper size limitations. If printing at home on standard paper, you might need to trim the excess to achieve your desired dimensions.
As one frustrated user noted in our research: “It’s amazing that the default Windows 7 print option doesn’t have a print actual size functionality.” This is precisely why checking your print settings carefully is so important—or why many of our customers prefer using Posterprintshop, where we handle these details for you.
I wish I could say yes, but unfortunately, Picasa 3 has pretty limited built-in print size options. It doesn’t offer a direct way to print completely custom sizes through its print dialog. But don’t worry—there are two simple workarounds I recommend to all my customers:
The export and print method is my go-to solution. Export your photo at the exact pixel dimensions needed for your custom size (as we’ve outlined earlier in this guide), then print the exported image using your system’s default photo viewer or a dedicated printing program with the “Actual Size” setting.
For truly perfect results, consider professional printing. Export your properly sized image and upload it to Posterprintshop, where we can print it at exactly the custom dimensions you need without any cropping or scaling issues.
One user in our forums summed it up perfectly: “Picasa does not have this feature,” referring to direct custom size printing. That’s exactly why the export method followed by printing through another application or service works so well.
While not ideal for printing, Picasa 3 does have some helpful automatic resizing features for sharing photos online or via email. Here’s how to set them up:
For email resizing, go to “Tools” → “Options,” then select the “Email” tab. From there, adjust the “Size for multiple pictures” slider to your preferred size. I typically recommend 1600 pixels for good quality that’s not too large for email. If you need print-quality in your emails, set “Size for single pictures” to “Original size.”
For web album uploads, head to “Tools” → “Options,” select the “Web Albums” or “Google+ Photos” tab, and choose your desired upload size.
Just remember—while these automatic options are great for sharing, they’re not ideal for printing. For print preparation, stick with the manual export method we covered earlier to ensure you have precise control over your image dimensions.
This is one of my favorite questions because the answer really depends on what story you’re trying to tell with your image. The ideal print size varies based on subject matter, composition, and where you plan to display it.
For portraits, traditional sizes like 8×10, 11×14, or 16×20 inches work beautifully in frames. I’ve found that 11×14 offers a perfect balance—large enough to see details in faces but not overwhelming in most spaces.
If you’re printing landscapes, consider panoramic formats like 12×36 or 20×60 inches to showcase those breathtaking wide vistas. There’s nothing like a panoramic print to capture the majesty of a mountain range or ocean view!
For action shots of sports or movement, 8×12 or 12×18 inches provide good detail while capturing the energy of the moment. These slightly rectangular formats give a dynamic feel that complements action.
When printing group photos, go larger—16×20 or 20×30 inches ensure everyone is visible and no one feels left out. I learned this lesson after printing my extended family reunion photo too small and squinting to find myself!
For abstract or artistic photos, I love square formats like 8×8, 12×12, or 16×16 inches for their modern, balanced look. Square formats work particularly well for social media images brought into the physical world.
At Posterprintshop, we can print your photos at any custom size you need, allowing you to choose dimensions that perfectly complement your specific image and display requirements. After all, why compromise on standard sizes when your vision is anything but standard?
Mastering how to print custom sized photo in Picasa 3 opens up endless creative possibilities for displaying your favorite images. While Picasa 3 doesn’t offer a direct option for printing custom sizes, the straightforward techniques we’ve discussed make it surprisingly easy to achieve your exact desired results.
The first essential step is to set up the correct aspect ratio. Using Picasa 3’s custom cropping tool, you’ll ensure your photos match the dimensions you’re aiming for. Next, you’ll export your image using the “Export Picture to Folder” feature. This allows you to precisely specify pixel dimensions, giving you perfect control over your image’s size and quality.
When it comes time to print, simply open your exported photo in your regular printing software and select “Actual Size” or “100% scaling”. This small detail guarantees your printed image matches the exact dimensions you’ve planned. If your custom size doesn’t match standard paper, no worries—just print on a larger sheet and trim off the excess afterward.
I know this process may have sounded a bit tricky at first, but as you’ve seen, getting the perfect-sized print out of Picasa 3 is actually pretty straightforward once you know the steps. And, if you ever run into issues like unexpected cropping, stretched images, or quality concerns—refer back to the troubleshooting tips we’ve provided in this guide. A quick check of your export settings and print scaling usually does the trick.
At Posterprintshop, we’re passionate about helping you showcase your photos exactly how you envision them. Whether you’re creating a personalized gallery wall, filling an unusual-sized frame, or preparing images for an important project, knowing exactly how to print custom sized photo in Picasa 3 will make all the difference.
If you want truly professional results without worrying about cropping or trimming at home, Posterprintshop has you covered. We specialize in custom-size photo printing, offering exceptional quality, accurate colors, and a wide range of materials—all at unbeatable prices. Plus, our quick turnaround means you’ll have your custom prints sooner rather than later.
Ready to bring your custom-sized images beautifully to life? Check out our Custom Size Poster Printing to explore your options and place your order. For more great tips and creative ideas, you can also read our guide, Opening Up the Power of Custom Size Photo Prints.
Happy printing!