Ever looked at a favorite photo and thought, “This would make an amazing sticker”? You’re not alone! Turning your cherished images into durable vinyl decals is easier than you might think.
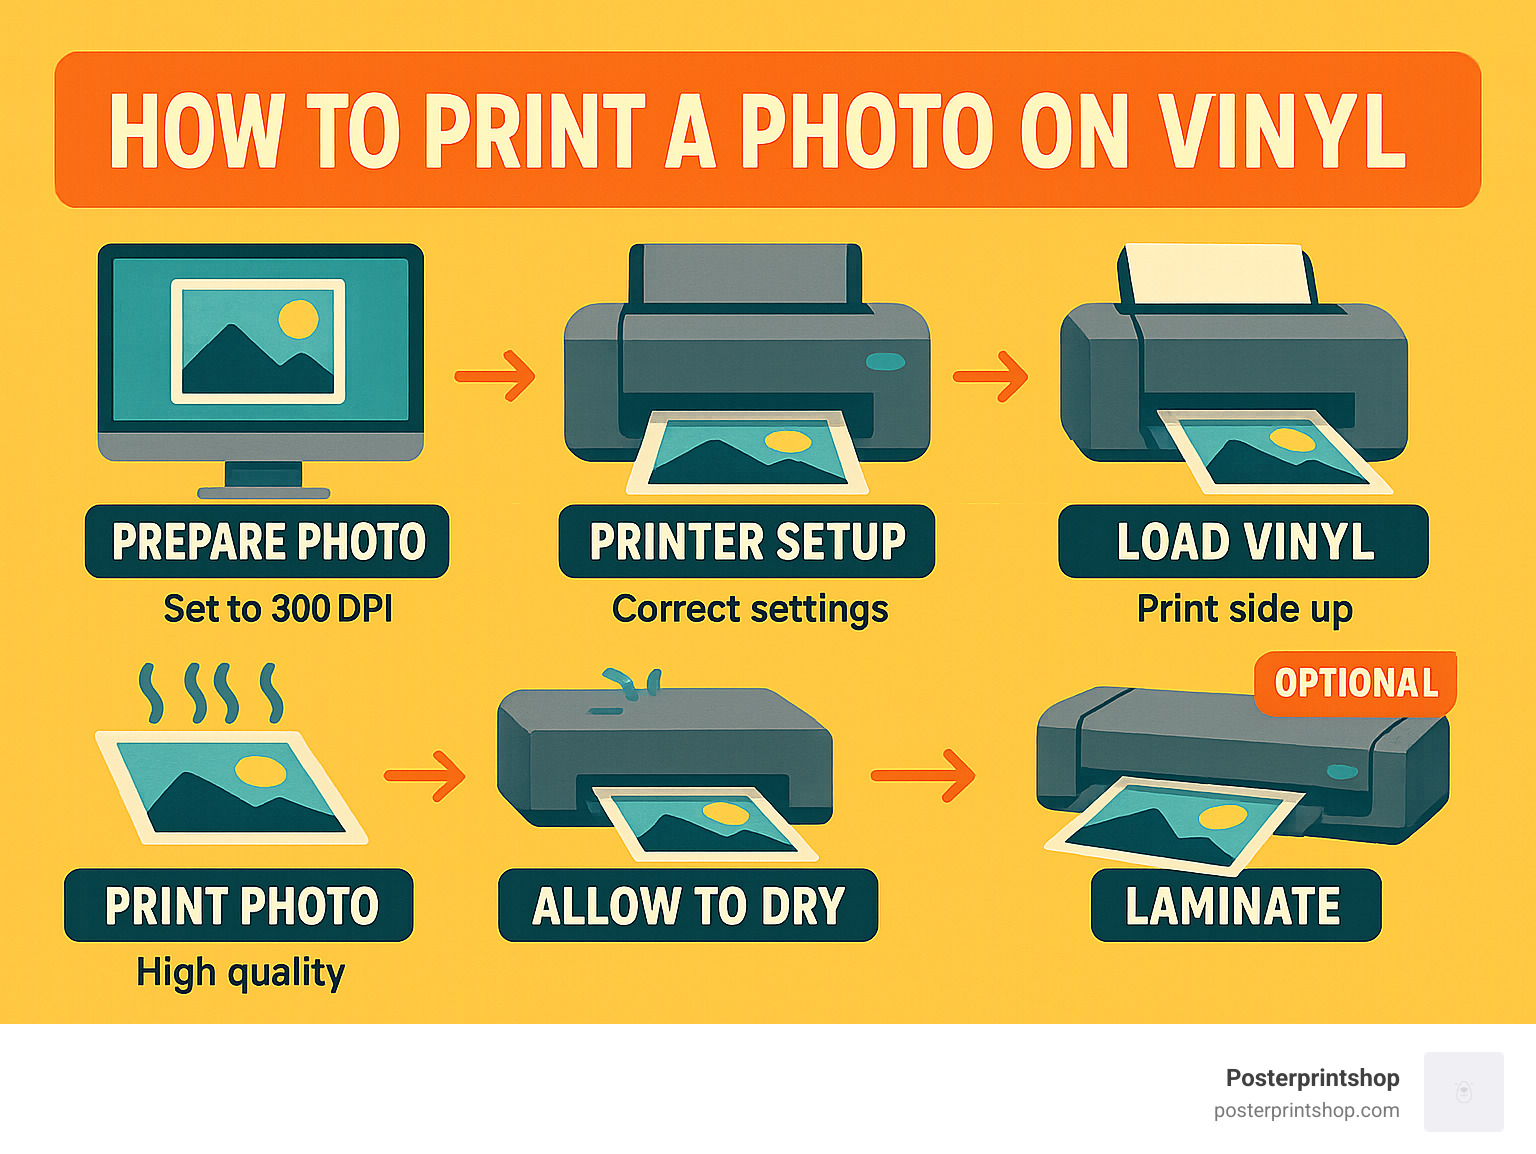
How to print a photo on vinyl comes down to five simple steps that anyone can master:
What surprises most people is that you don’t need fancy equipment to create professional-looking vinyl decals. Your standard home inkjet printer can do the job beautifully! The secret isn’t in having expensive gear—it’s all about using the right materials.
Traditional vinyl would simply repel your printer’s water-based inks, leaving you with a mess. But printable vinyl is different—it features a special ink-receptive coating that welcomes those inks with open arms, allowing your photos to stick without bleeding or fading. This clever innovation has brought custom vinyl creation into homes and small businesses everywhere.
Hi there! I’m Brett Henrichsen, founder of Posterprintshop. With over two decades of printing experience, I’ve helped countless customers learn how to print a photo on vinyl for everything from personalized stickers to business signage. There’s something magical about seeing an ordinary photo transform into a durable, professional vinyl product that can brighten up any space.
Ready to give it a try? In the following sections, I’ll walk you through everything you need to know—from choosing the right materials to applying your finished decals. By the end, you’ll be creating vinyl masterpieces that will have friends asking, “Where did you buy that?”
Before diving into the printing process, understand the different types of vinyl available and which printers work best with them. Not all vinyl is created equal, and using the wrong type can lead to disappointing results or even damage to your printer.
When it comes to printable vinyl for home use, you generally have three main options:
Printable Adhesive Vinyl: This is the most common type for creating decals and stickers. It features a permanent or removable adhesive backing and comes in white, clear, or even metallic finishes. The vinyl itself has a special coating that accepts ink from inkjet printers.
Printable Heat Transfer Vinyl (HTV): Designed specifically for applying to fabrics, this type allows you to print photos and then heat-press them onto t-shirts, tote bags, and other textiles. It comes in versions for both light and dark fabrics.
Clear Printable Vinyl: Perfect for creating “see-through” effects where you want the background to show through, this type is popular for window decals and glass applications.
As Rob from a crafting forum notes, “Printing a photo onto vinyl isn’t as simple as just sending it to your printer. You need vinyl specifically designed with a print-receptive coating.”
Printable vinyl stands apart from regular vinyl in several important ways:
Ink-Receptive Coating: The most crucial difference is the special film coating on printable vinyl that carries and holds ink, preventing bleeding or fading.
Water Resistance: Once printed and properly dried, the coating helps make your printed image waterproof or at least highly water-resistant.
Thickness: Printable vinyl is typically available in standard 8.5 x 11 inch sheets that are slightly thicker than regular paper but thin enough to feed through a standard printer.
As one user from a DIY forum explained, “Printable vinyl has a special film coating that carries ink, preventing bleeding or fading. That’s why you can’t just print on any vinyl sheet.”
The type of printer you own will largely determine what kind of vinyl you can use:
Inkjet Printers: Most home printable vinyl is designed specifically for inkjet printers. These printers use either:
– Dye-based inks: More vibrant but less water-resistant
– Pigment-based inks: More durable and fade-resistant, ideal for vinyl printing
Laser Printers: Very few vinyl products are laser-compatible because the high heat used in laser printing can melt or warp standard vinyl. If you only have a laser printer, look specifically for “laser-compatible vinyl sheets” which are designed to withstand higher temperatures.
“No-can-do with an off the shelf printer — the ink needs to chemically bond or melt into the vinyl, regular inkjets are waterbased and will not work and laser printers would melt the vinyl.” – Doug, printing specialist
Professional Options: For truly commercial-grade vinyl printing, professional shops use:
– Eco-solvent printers: Starting around $7,000, these use special inks that chemically bond to vinyl
– Thermal ribbon printers: Starting around $3,000, these melt ink onto the vinyl surface
For most home users, a standard inkjet printer with good photo capabilities and printable vinyl sheets is the sweet spot for quality and affordability.
For more detailed information about vinyl printing options, check out this Vinyl Photo Print guide or this comprehensive Vinyl Cutting Tutorial from Instructables.

Turning your favorite photos into vinyl masterpieces requires a bit of prep work. I’ve seen countless DIY projects go from “meh” to “wow!” just by getting the design setup right from the start. Let’s walk through how to make your photos shine on vinyl.
Not every photo in your gallery is vinyl-ready, but with a few tweaks, most can look amazing. Start by selecting images with good clarity and contrast.
Resolution matters tremendously when printing on vinyl. Aim for at least 300 PPI (pixels per inch) at your desired print size to avoid that dreaded pixelated look. A photo that looks great on your phone might turn blurry when expanded to an 8×11 sheet.
I always recommend brightening your photos by 10-15% before sending them to print. Vinyl has a tendency to darken images slightly—what looks perfect on your bright screen often prints a shade or two darker on material. As Maria, one of our regular customers, told me: “I was disappointed with my first vinyl prints until I started brightening every photo. Now they come out exactly as I expect!”
Gentle sharpening can make details pop beautifully on vinyl, but there’s definitely a sweet spot. Too much sharpening creates an unnatural, over-processed look that screams “amateur.” A light touch works wonders here.
Don’t forget to clean up any imperfections in your photo. Those tiny dust spots or red-eye issues you barely notice on screen can become glaring distractions on your finished vinyl piece.
Smart layout planning saves both time and expensive vinyl sheets. When I’m helping customers with their projects, I always suggest creating a template at exactly 8.5×11 inches (or whatever vinyl sheet size you’re using). Include a small 0.25-inch margin around the edges—printers often struggle with borderless printing on specialty materials.
If you’re planning to use a Cricut or Silhouette cutting machine, remember to add registration marks to your design. These little guides help your cutting machine understand exactly where to slice, giving you perfectly trimmed images every time.
For multi-part designs, group similar elements together on your layout. This simple organization trick minimizes waste and makes the weeding process (removing unwanted vinyl) much more straightforward later on.
When your design needs to extend all the way to the edge, include a 0.125-inch bleed area beyond your cut line. This extra bit ensures you won’t end up with annoying white edges if your cuts aren’t perfectly aligned.
Getting true-to-life colors on vinyl can be tricky, but it’s definitely achievable with a few insider techniques.
If you’re serious about color accuracy, monitor calibration makes a huge difference. What you see should match what you get, and calibrated screens help bridge that digital-to-physical gap.
For most photo printing on vinyl, the sRGB color profile works beautifully, though CMYK might be better for certain specialized applications. If you’re unsure which to use, sRGB is generally the safer bet for home printing projects.
Before committing to a full-size print, I always recommend printing small test patches with color swatches. This quick step can save you from wasting an entire vinyl sheet on colors that don’t match your expectations.
When it’s time to print, select “high quality” or “photo paper” mode in your printer settings. This tells your printer to use more ink and make more passes, resulting in richer, more vibrant colors on your vinyl. These settings make a remarkable difference in the final product, especially for photos with subtle color gradients or skin tones.
“I never skimp on quality settings when printing on vinyl,” shares Jeff, a craft store owner. “The extra minute of print time saves hours of frustration and disappointment.”
For more detailed guidance on vinyl banner printing techniques that also apply to smaller vinyl projects, check out our Vinyl Banner Printing guide.
With these design and color preparations complete, you’re ready to move on to the actual printing process. These foundational steps might seem tedious, but they’re what separate professional-looking vinyl prints from obvious DIY attempts. Trust me—your future self will thank you for taking the time to get it right from the start.
Ready to turn your favorite photos into vinyl stickers? Let’s walk through the actual printing process together. I’ve helped hundreds of crafters get this right, and with these simple steps, you’ll be creating professional-looking vinyl prints in no time.
Getting your vinyl properly positioned in your printer is half the battle!
Most printable vinyl has a pretty obvious printable side – it’s usually the matte white side, not the shiny backing. Still confused? Check the package instructions or look for manufacturer markings. I once loaded an entire pack backward before realizing my mistake!
Position your vinyl in the printer tray with the printable side facing up (for most printers). If your printer has a manual feed slot, consider using it for thicker vinyl sheets – it provides a straighter path through the printer and reduces those frustrating paper jams. Don’t forget to snug those paper guides against the vinyl sheet to prevent it from feeding at an angle.
As one customer told me, “I wasted three sheets before I realized I was printing on the wrong side! The printable side is blank, while the liner side usually has gridlines and a logo. For clear vinyl, you’ll want to print on the shiny side.”
Your printer settings are absolutely crucial for quality vinyl prints. Here’s how to get them just right:
After hitting “Print” in your design software, click on “Properties” or “Advanced Options” to access the detailed settings menu. Instead of using the default paper settings, select “Photo Paper,” “Premium Matte,” or “Specialty Media” depending on what your printer offers. This tells your printer to lay down ink differently than it would for regular copy paper.
Always select “Best” or “High Quality” print mode – this isn’t the time to save ink with “Draft” or “Normal” settings! If your design goes to the edge of your vinyl, consider enabling borderless printing if your printer supports it. And be sure to disable any “high-speed” options that might reduce print quality.
How to print a photo on vinyl with the best results? One crafting expert put it perfectly: “Use high quality or photo paper settings for the brightest images. If you notice smudging, try reducing to good quality – sometimes too much ink can be just as problematic as too little.”
Now for the exciting part – bringing your design to life! But patience will be your best friend here.
If possible, print on regular paper first to check alignment and colors. Once you’re satisfied, send your vinyl through. While it’s printing, resist the urge to touch or jostle the printer – let it do its thing undisturbed.
Here’s the step many people rush: drying time. Let your freshly printed vinyl sit undisturbed for at least 30 minutes (some vinyl types may need up to 24 hours) to allow the ink to fully cure and bond with the vinyl’s coating. Never use a heat gun, hair dryer, or other heat source to speed drying – this can warp the vinyl or cause the ink to run.
One DIY enthusiast shared her hard-learned lesson: “Let the ink dry completely before cutting or weeding. I’ve ruined more than one project by being impatient! Now I print in the evening and let my designs dry overnight.”
Need the express version? Here’s the quick guide for when you’re in a hurry:
Prepare your photo at 300 PPI minimum resolution, load vinyl print-side up in your inkjet printer, select “photo paper” and “high quality” in printer settings, print and wait at least 30 minutes before handling, then cut as desired once completely dry.
The good news? “You don’t need special inks—standard OEM ink cartridges work perfectly fine for vinyl printing,” confirms our in-house printing specialist at Posterprintshop.
While inkjet printers are generally preferred for vinyl, laser printers can work with the right precautions:
First, you must purchase vinyl specifically labeled as “laser-compatible” or “laser-safe.” Regular printable vinyl can melt inside your laser printer, potentially causing damage. Use low temperature settings if your printer allows this adjustment, and print just one sheet at a time to reduce heat buildup.
Give your prints extra cooling time before handling, and check your printer warranty – some manufacturers don’t recommend specialty media and might not cover damage that occurs while printing on vinyl.
One vinyl manufacturer warns, “Should I use an inkjet printer or a laser printer with these materials? Use inkjet printers only; laser printers may damage the material unless you’re using specially formulated laser-safe vinyl.”
| Printer Type | Pros | Cons | Durability |
|---|---|---|---|
| Inkjet | Works with most printable vinyl, vibrant colors, affordable | Needs drying time, can smudge if wet | 1-3 years outdoors with lamination |
| Laser | Faster drying, water-resistant immediately | Limited vinyl compatibility, can melt vinyl, higher cost | 2-5 years outdoors with proper vinyl |
| Eco-Solvent | Professional quality, extremely durable | Very expensive equipment ($7,000+), requires ventilation | 5+ years outdoors |
With these steps mastered, you’re well on your way to creating beautiful vinyl prints that will turn heads and last for years to come!
Once your photo is printed on vinyl, several finishing steps can improve durability and appearance. These steps transform your printed sheet into a professional-looking final product.
Depending on your equipment and design, you have several options:
Using Electronic Cutting Machines:
1. Cricut Settings: If using a Cricut machine, select “Print Then Cut” in Design Space, load your printed vinyl on a LightGrip mat, and follow the on-screen prompts. For most printable vinyl, use the “Printable Vinyl” material setting.
“I always set my Silhouette to a force of 14 for printable vinyl, even though the default is lower. It gives me a perfect ‘kiss cut’ every time,” shares an experienced crafter.
Manual Cutting Options:
1. Precision Scissors: For simple shapes, high-quality scissors work well. Cut slightly inside the printed line for a clean edge.
Craft Knife: For intricate designs, a sharp craft knife and cutting mat offer more precision than scissors.
Paper Trimmer: For straight lines and rectangular designs, a paper trimmer provides clean, straight cuts.
Lamination can significantly extend the life of your vinyl prints:
Benefits of Lamination:
– Weather Resistance: Protects against rain, sunlight, and humidity
– Scratch Protection: Prevents damage from handling and use
– Color Preservation: Blocks UV rays that cause fading
– Improved Appearance: Can add glossy or matte finish
Lamination Options:
1. Cold Laminate Sheets: These adhesive sheets are applied by hand and are ideal for home use.
2. Self-Adhesive Laminate: Similar to clear contact paper, this is affordable and easy to apply.
3. Spray Sealants: Clear acrylic sprays can provide basic protection for indoor use.
“Laminating your printed vinyl stickers makes them water resistant and UV protected, increasing their durability for outdoor use,” explains a vinyl printing specialist.
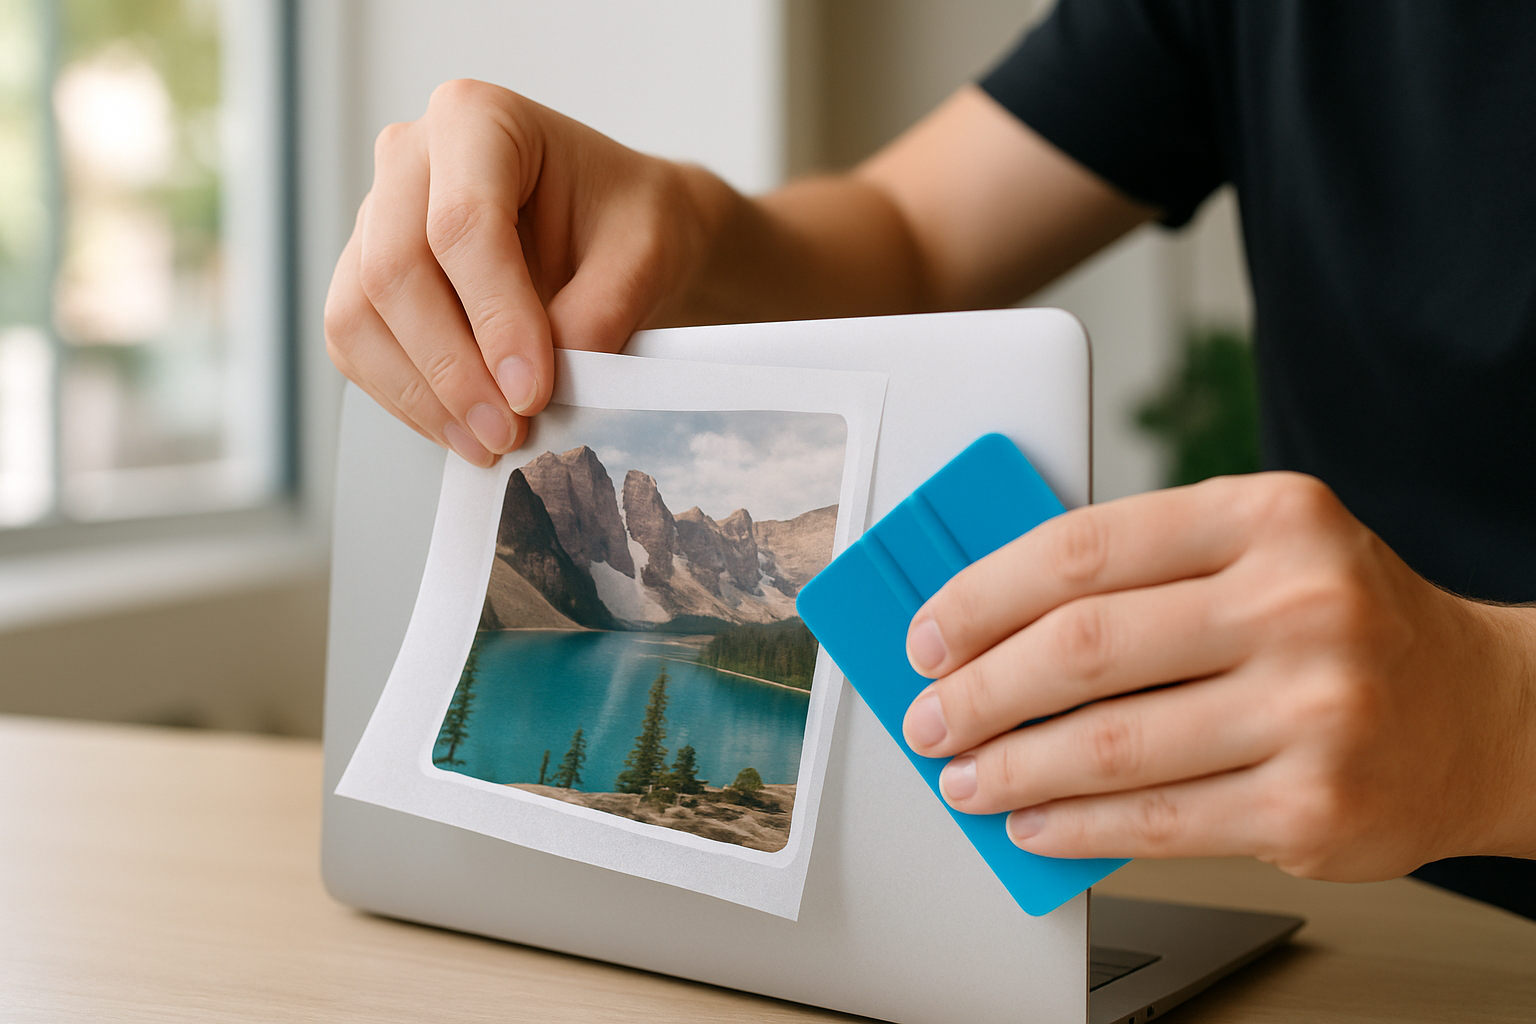
Proper application ensures your vinyl decal looks professional and lasts longer:
Clean the Surface: Use isopropyl alcohol to remove any dirt, oil, or residue from the application surface.
The Hinge Method:
Repeat with the other half
Removing Bubbles:
“Apply pressure evenly with a credit card or hand to avoid bubbles,” advises a decal application expert. “And always clean the target surface thoroughly before applying vinyl.”
Keep your vinyl prints looking great and avoid these common pitfalls:
Care Instructions:
– Indoor Applications: Clean with a soft, damp cloth (no harsh chemicals)
– Outdoor Applications: Occasional gentle cleaning with mild soap and water
– Avoid Scrubbing: Never use abrasive cleaners or scrubbing tools
– Heat Sensitivity: Keep away from direct heat sources
Common Mistakes to Avoid:
1. Rushing the Drying Time: Not allowing ink to fully cure before handling
2. Incorrect Printer Settings: Using “plain paper” or “draft” quality settings
3. Over-Stretching: Pulling or stretching the vinyl during application
4. Applying to Textured Surfaces: Expecting smooth adhesion on rough textures
5. Ignoring Temperature: Applying vinyl in very cold conditions reduces adhesion
“Wait 24-48 hours before washing items with applied vinyl, wash garments inside out in lukewarm water without harsh detergents, and air-dry to maximize longevity,” recommends a vinyl care guide.
For a comprehensive guide on making and printing your own vinyl stickers at home, check out this detailed WikiHow tutorial on printing vinyl stickers. If you’re interested in professional vinyl sticker printing services, our Vinyl Sticker Printing Services guide provides all the information you need.
Changing your digital photos into eye-catching vinyl decals is totally doable at home—and honestly, it’s pretty fun once you get the hang of it! Throughout this guide, we’ve walked through everything you need to know about how to print a photo on vinyl, from choosing materials to applying your finished creation.
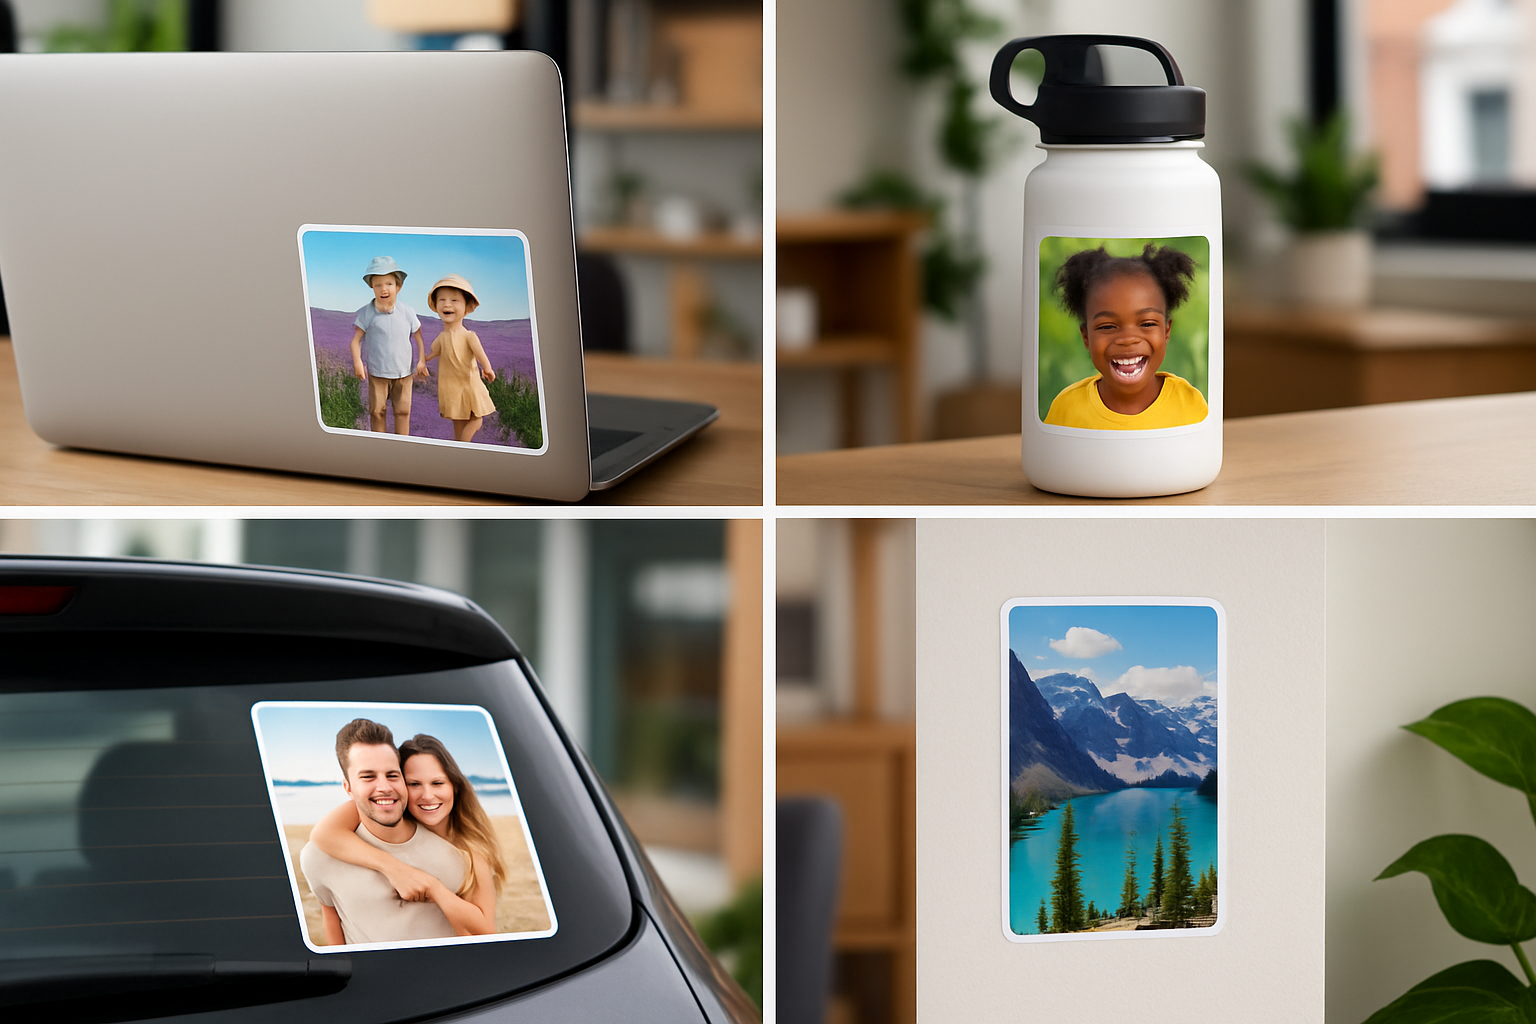
The magic of printing your own vinyl is in the possibilities. That family photo can become a laptop decal. Your child’s artwork can transform into a bumper sticker. Your logo can adorn merchandise without expensive minimum orders. The creative potential is endless once you master these techniques.
Success comes down to a few key principles. Always use vinyl specifically designed for your printer type—most home users will want inkjet-compatible sheets. Give your images some love before printing by ensuring they’re high-resolution (that 300 PPI minimum really matters) and slightly brighter than they appear on screen. When it’s time to print, treat your vinyl like the premium material it is by selecting those “photo paper” and “high quality” settings.
Patience pays off, too. I’ve learned the hard way that rushing the drying process leads to smudged designs and wasted materials. Give your prints that full drying time before handling—your future self will thank you!
For outdoor applications or items that will see frequent handling, don’t skip the lamination step. It’s that extra layer of protection that turns a good project into one that lasts for years. And when applying your decals, remember: clean surfaces and slow, careful application make all the difference between professional-looking results and obvious DIY attempts.
Don’t worry if your first attempts aren’t perfect. Like any craft, there’s a learning curve, and each project teaches you something valuable. Before long, you’ll develop an intuitive feel for what works with your specific printer and favorite vinyl types.
If you’re looking to go bigger or simply prefer professional-grade results without the DIY process, we at Posterprintshop are here to help. Our commercial printing equipment produces vibrant, durable vinyl prints perfect for business signage, vehicle graphics, or large-format decorative pieces. We combine quality materials with expert technique to deliver results that stand the test of time.
Whether you’re crafting personalized gifts, sprucing up your living space, or launching a small business selling custom decals, mastering how to print a photo on vinyl opens doors to creativity you might not have considered before. Each project builds your confidence and expands your skill set.
For more information about premium vinyl media or to explore professional printing options when your projects exceed home-printer capabilities, visit us at Posterprintshop. We’re always excited to help bring your creative visions to life!